|
About Leslie Peebles:
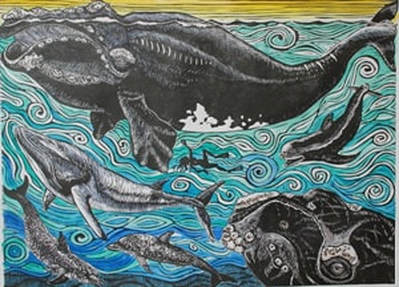
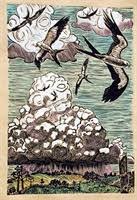
BiographyLeslie Peebles was born in Hackensack, New Jersey in 1959, lived there in the suburbs of New York City until 1971 when she and her family moved to Suwannee County, Florida where her father became a Broiler Chicken Producer for Gold Kist. Living on the 80 acre farm near the Suwannee River fostered a deep love, respect and fascination for nature. This experience, combined with few social opportunities and an outstanding High School Art Teacher, Jeffery Ann Smart Baisdon, led Ms. Peebles to grow and develop into a young artist. Leslie attended The University of the South in Sewanee Tennessee, married after her junior year and received her B.A. in Studio Art from Newcomb College in New Orleans in 1981. Leslie moved to Gainesville in 1985 and, while raising three children, received an M.A. in Art Education from U.F. in 1994 and began her teaching career. Inspired by teaching linoleum block printmaking to her students, Ms. Peebles began creating her own art using this medium. She joined the Center for Modern Art in Gainesville in 1996 and began showing with them in group shows and alternative art spaces. She joined Sweetwater Print Cooperative in 1999 which broadened her printmaking experiences, provided crucial equipment and space for her use and helped Ms. Peebles become an emerging regional artist. |
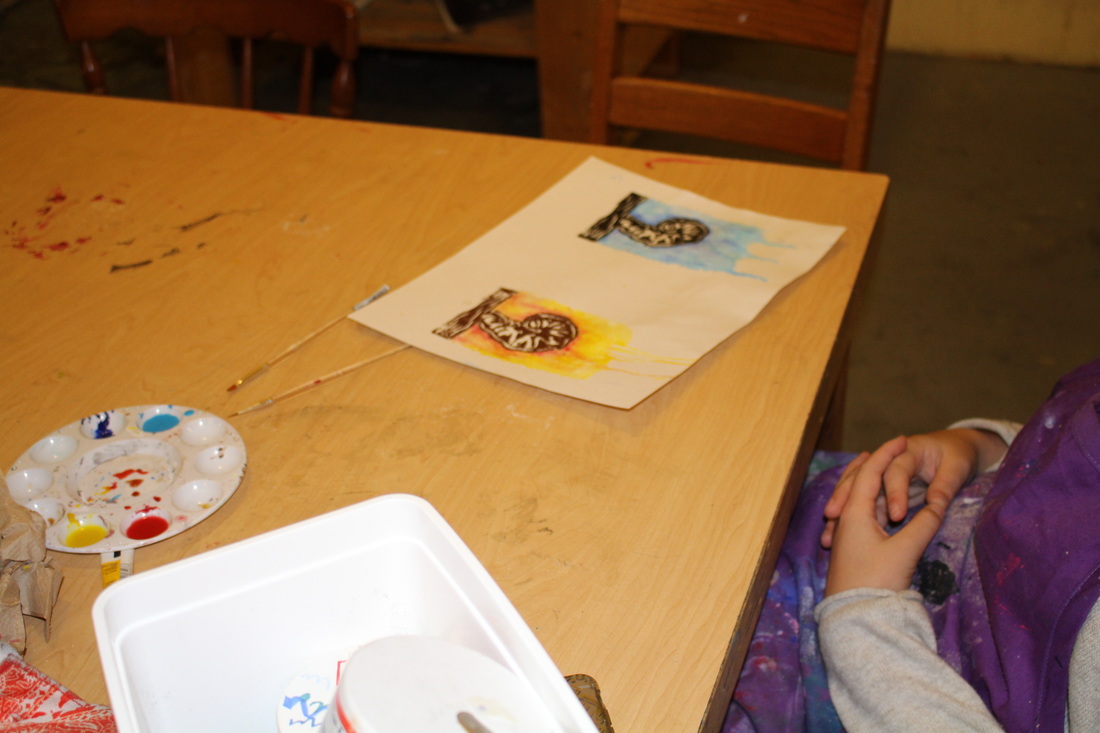
Using the works of Leslie Peebles as an inspiration, students will create a linoleum relief print. They will be using black ink and adding color using watercolor paints. These prints should be representative of themselves and nature.
Each print will be accompanied by an artist statement.
Each print will be accompanied by an artist statement.
Materials Needed:
• Pen, marker, pencil, colored pencil
• Linoleum block
• Paper
• Transfer paper
• Lino Handle/lino cutters
• Printer’s ink (Oil Based)
• Brayer (ink roller)
• Tape
• Scissors
• Spoon (or a Baren)
• Glass surface (plate or baking pan will do)
Steps:
PLANNING:
1. Get inspired! Begin by researching linoleum block prints online. Look at what lines and art styles you like while considering what design or drawing you want to carve for you print.
a. Remember: You will essentially be creating a large stamp. So your drawing should go on the block the opposite way that you want it to be printed.
b. Also remember: You will be carving your design into a piece of linoleum, so if this is your first time carving a linoleum block, consider doing something relatively simple, rather than a complicated design with lots of fine lines.
DRAWING:
2. Draw out your design. Be sure to make the drawing the same size as your linoleum block, so that you don’t have to mess with resizing the picture and printing it before you begin to transfer.
**. Remember to keep in mind that the lines that you carve away will be white, and the block that remains will be what prints color. **
TRANSFER:
3. After you have drawn a design that you are pleased with, you will need to transfer that design to the linoleum side of the block for carving. You will need to use transfer paper to do this or you can darken in the back of your paper with your pencil. To be sure that the paper does not slip, take the paper and tape it to the linoleum block. After you have taped down the paper, position your design, facing the drawing side up. Be sure that you like how the design is placed and tape the design down as well. Now you will need to trace over the lines you have drawn again to transfer the design onto the block, by pressing the pencil down firmly over the lines. Be sure that you trace all of the lines onto the block. Using another color pencil can help you differentiate the traced lines from the lines you have yet to trace.
** After you have transferred the design onto the linoleum, you might need to go in with a pencil and fill in any small areas that you missed, or add in any details that you feel necessary. You might also want to trace over the pencil lines with a permanent marker, because as you begin carving the pencil lines can smudge and become difficult to see.
Once you have traced your image, design or drawing onto the block, you are ready to determine which parts of the block you want to carve. Consider which lines you want to be white, and what parts of the design will be printed in color.
Do you want the lines of your drawing to be in white, or printed in color?
Do you want the majority of your block to be white, or in color?
CUTTING:
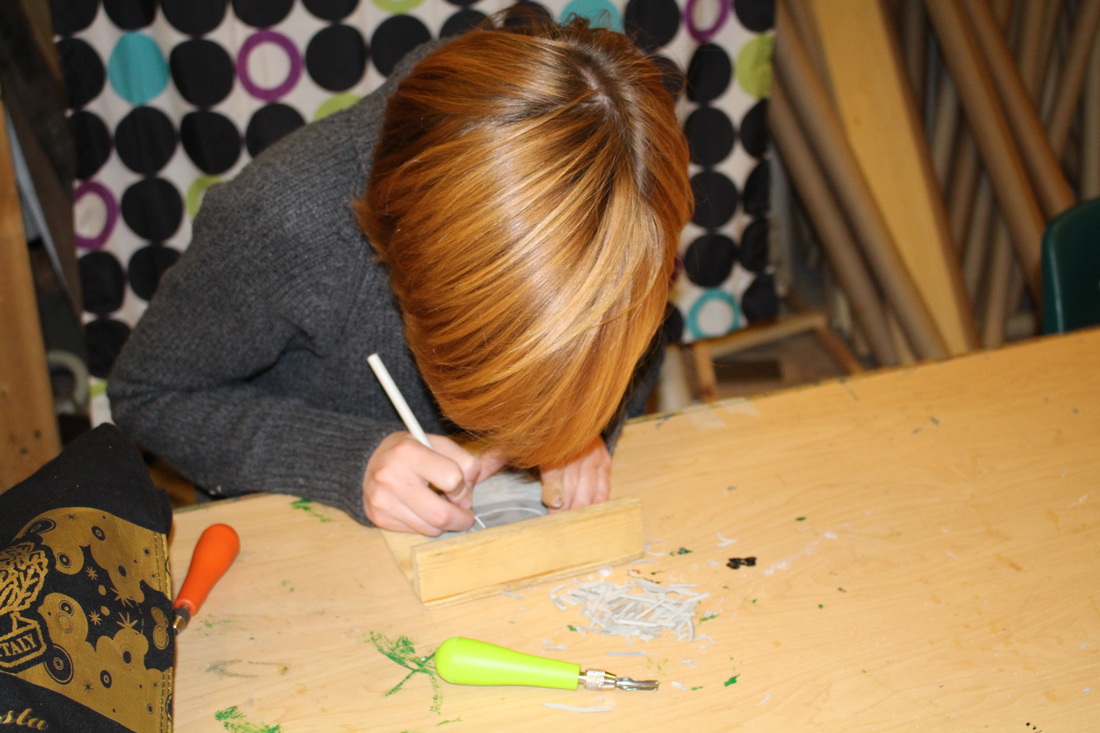
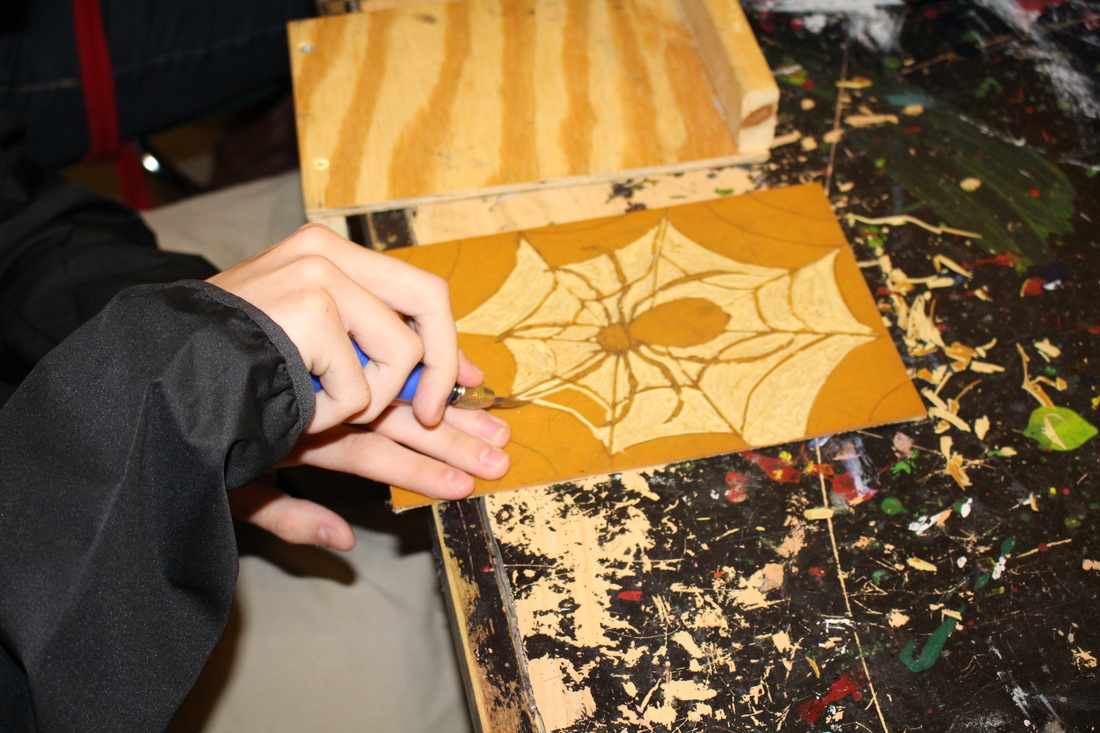
4. Now it is time to start making your cuts! For beginners it is always important to know that you must be very careful with the tools, they are essentially knifes, and they are very sharp. With that in mind, remember:
a. Never cut towards your hand or towards you body! Always cut away from yourself! Keep your hands out of the path of the blade!
To secure the block so that it does not slip or slide, use a bench hook, it attaches to the end of your desk or work space and helps to keep your block nice and secure while carving.
Start by using a V shaped tool, a smaller, fine tipped tool, to carve out fine lines and to outline of the design. You can use other blades that will come with the lino handle to cut different amounts of linoleum. To remove more of the linoleum for bigger lines or larger areas of block, use a U shaped tool, much like the V shaped tool, but the blade is a bit wider and flatter. Use a flat chisel to remove large amounts of linoleum.
** Remember: Once you make a cut, it is not easy to fix, and sometimes it is impossible to fix. So choose the right tool, make sure the tools are sharp, and go slow! Block printing, particularly the carving, is a slow process that requires a lot of patience. Take your time! **
PRINTING:
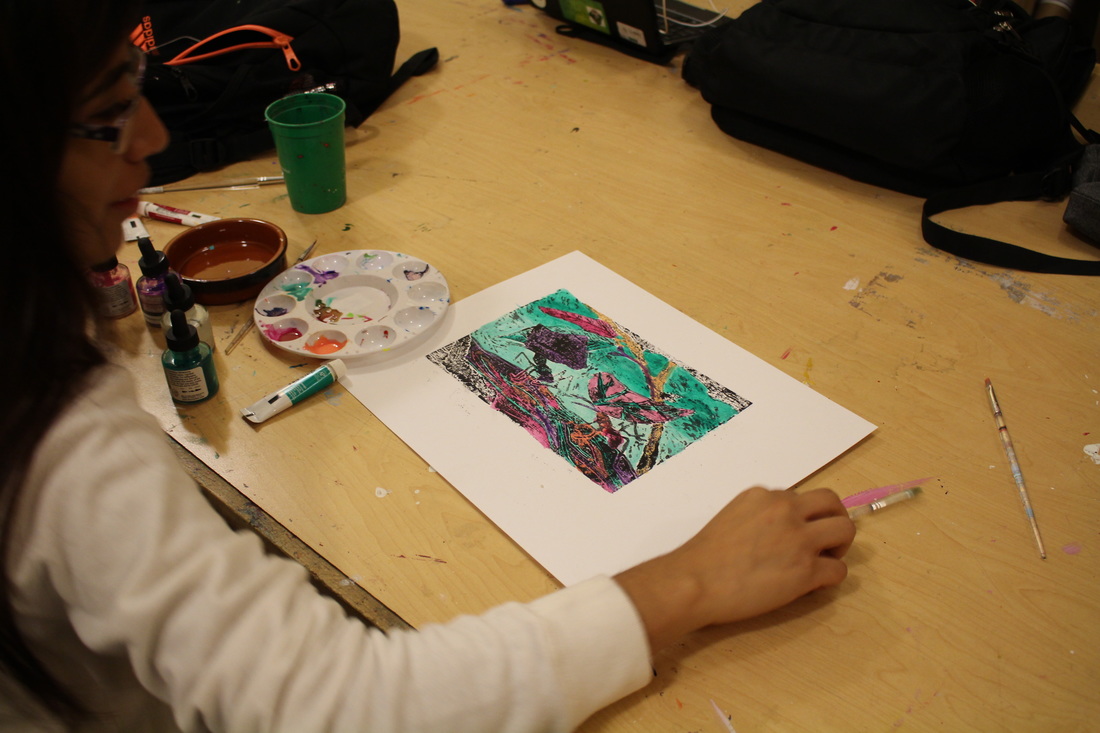
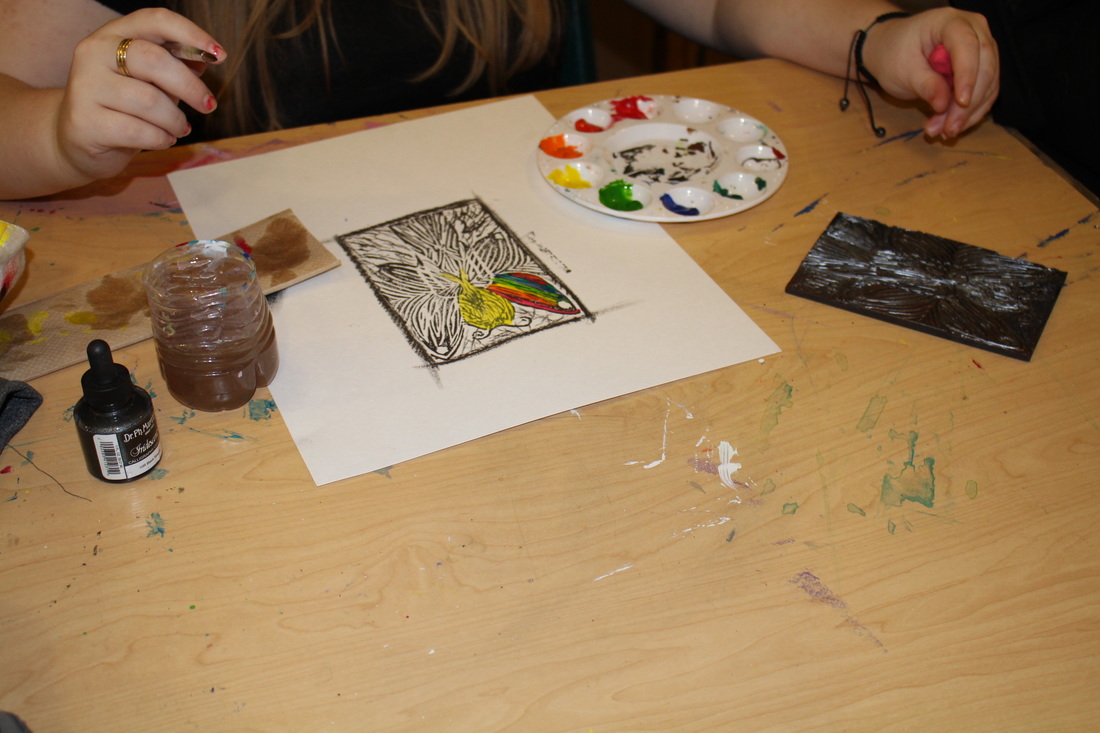
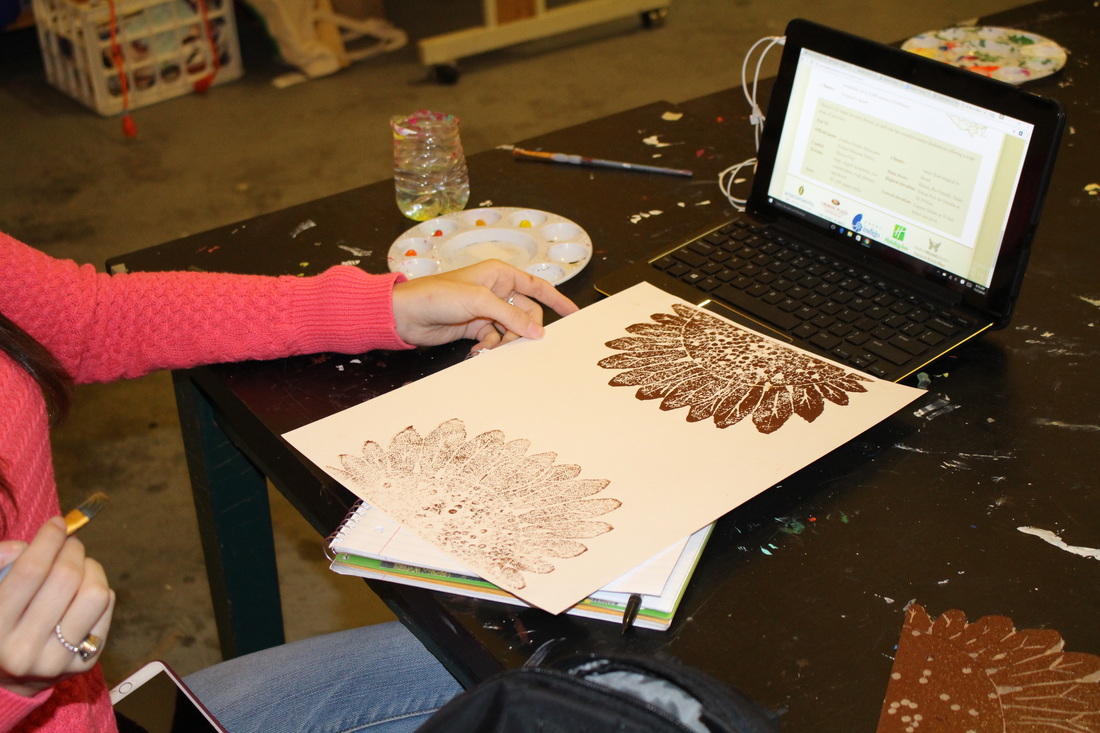
Proofing: Proofing is important. It shows you how the block will print and what mistakes you need to fix before you start really printing. You can proof your print on any scrap paper you have around so that you don’t waste good paper on proofs, you can use the paper for your good prints instead.
After you have proofed, you can go back and carve out the parts of the design that didn't print the way you might have liked. Try to proof your block every time that you make new cuts to make sure you are satisfied with the way that the block is printing.
To print you will need:
• Printer’s Ink (NOTE: Oil ink is permanent, so be sure to wear clothes you don’t mind getting dirty and consider wearing rubber gloves to keep your hands clean.)
• Carved block
• Ink roller (brayer)
• Smooth surface (glass plate or glass baking pan)
• Paper
• Spoon (or Baren)
Be sure to first clean your block off so that there are no stray shavings because they will mess up your print.
Begin by squeezing ink onto your glass plate. Do not use too much ink, if you need more you can add on later.
Use a paint knife or just a flat utensil like regular knife or even simply a Popsicle stick to spread the ink onto the surface of the plate.
Now, roll your brayer (roller) in the ink until it is evenly coated. Do not get too much or too little ink on the roller. When you have the right amount of ink on the roller, it should make a sound like ripping Velcro when you roll the brayer back and forth.
Now taker your roller and roll it back and forth across your linoleum block, making sure you cover the entire thing evenly.
Make sure your hands are clean!
Take your paper and position it in the block, now take your fist and rub to transfer the image. Go in even circles with your fist and be sure to rub the entire area.
Lift the paper slowly and carefully, and lay it somewhere to dry for three to four days. Hanging prints is an easy way to dry them. You can do this by hanging a string and use clothespins to hang the prints.
After every print you need to re-ink the block.
TAKE YOUR TIME, HAVE FUN AND BE CREATIVE!
• Pen, marker, pencil, colored pencil
• Linoleum block
• Paper
• Transfer paper
• Lino Handle/lino cutters
• Printer’s ink (Oil Based)
• Brayer (ink roller)
• Tape
• Scissors
• Spoon (or a Baren)
• Glass surface (plate or baking pan will do)
Steps:
PLANNING:
1. Get inspired! Begin by researching linoleum block prints online. Look at what lines and art styles you like while considering what design or drawing you want to carve for you print.
a. Remember: You will essentially be creating a large stamp. So your drawing should go on the block the opposite way that you want it to be printed.
b. Also remember: You will be carving your design into a piece of linoleum, so if this is your first time carving a linoleum block, consider doing something relatively simple, rather than a complicated design with lots of fine lines.
DRAWING:
2. Draw out your design. Be sure to make the drawing the same size as your linoleum block, so that you don’t have to mess with resizing the picture and printing it before you begin to transfer.
**. Remember to keep in mind that the lines that you carve away will be white, and the block that remains will be what prints color. **
TRANSFER:
3. After you have drawn a design that you are pleased with, you will need to transfer that design to the linoleum side of the block for carving. You will need to use transfer paper to do this or you can darken in the back of your paper with your pencil. To be sure that the paper does not slip, take the paper and tape it to the linoleum block. After you have taped down the paper, position your design, facing the drawing side up. Be sure that you like how the design is placed and tape the design down as well. Now you will need to trace over the lines you have drawn again to transfer the design onto the block, by pressing the pencil down firmly over the lines. Be sure that you trace all of the lines onto the block. Using another color pencil can help you differentiate the traced lines from the lines you have yet to trace.
** After you have transferred the design onto the linoleum, you might need to go in with a pencil and fill in any small areas that you missed, or add in any details that you feel necessary. You might also want to trace over the pencil lines with a permanent marker, because as you begin carving the pencil lines can smudge and become difficult to see.
Once you have traced your image, design or drawing onto the block, you are ready to determine which parts of the block you want to carve. Consider which lines you want to be white, and what parts of the design will be printed in color.
Do you want the lines of your drawing to be in white, or printed in color?
Do you want the majority of your block to be white, or in color?
CUTTING:
4. Now it is time to start making your cuts! For beginners it is always important to know that you must be very careful with the tools, they are essentially knifes, and they are very sharp. With that in mind, remember:
a. Never cut towards your hand or towards you body! Always cut away from yourself! Keep your hands out of the path of the blade!
To secure the block so that it does not slip or slide, use a bench hook, it attaches to the end of your desk or work space and helps to keep your block nice and secure while carving.
Start by using a V shaped tool, a smaller, fine tipped tool, to carve out fine lines and to outline of the design. You can use other blades that will come with the lino handle to cut different amounts of linoleum. To remove more of the linoleum for bigger lines or larger areas of block, use a U shaped tool, much like the V shaped tool, but the blade is a bit wider and flatter. Use a flat chisel to remove large amounts of linoleum.
** Remember: Once you make a cut, it is not easy to fix, and sometimes it is impossible to fix. So choose the right tool, make sure the tools are sharp, and go slow! Block printing, particularly the carving, is a slow process that requires a lot of patience. Take your time! **
PRINTING:
Proofing: Proofing is important. It shows you how the block will print and what mistakes you need to fix before you start really printing. You can proof your print on any scrap paper you have around so that you don’t waste good paper on proofs, you can use the paper for your good prints instead.
After you have proofed, you can go back and carve out the parts of the design that didn't print the way you might have liked. Try to proof your block every time that you make new cuts to make sure you are satisfied with the way that the block is printing.
To print you will need:
• Printer’s Ink (NOTE: Oil ink is permanent, so be sure to wear clothes you don’t mind getting dirty and consider wearing rubber gloves to keep your hands clean.)
• Carved block
• Ink roller (brayer)
• Smooth surface (glass plate or glass baking pan)
• Paper
• Spoon (or Baren)
Be sure to first clean your block off so that there are no stray shavings because they will mess up your print.
Begin by squeezing ink onto your glass plate. Do not use too much ink, if you need more you can add on later.
Use a paint knife or just a flat utensil like regular knife or even simply a Popsicle stick to spread the ink onto the surface of the plate.
Now, roll your brayer (roller) in the ink until it is evenly coated. Do not get too much or too little ink on the roller. When you have the right amount of ink on the roller, it should make a sound like ripping Velcro when you roll the brayer back and forth.
Now taker your roller and roll it back and forth across your linoleum block, making sure you cover the entire thing evenly.
Make sure your hands are clean!
Take your paper and position it in the block, now take your fist and rub to transfer the image. Go in even circles with your fist and be sure to rub the entire area.
Lift the paper slowly and carefully, and lay it somewhere to dry for three to four days. Hanging prints is an easy way to dry them. You can do this by hanging a string and use clothespins to hang the prints.
After every print you need to re-ink the block.
TAKE YOUR TIME, HAVE FUN AND BE CREATIVE!
